
Make a network weather station with NodeMcu for under 20$
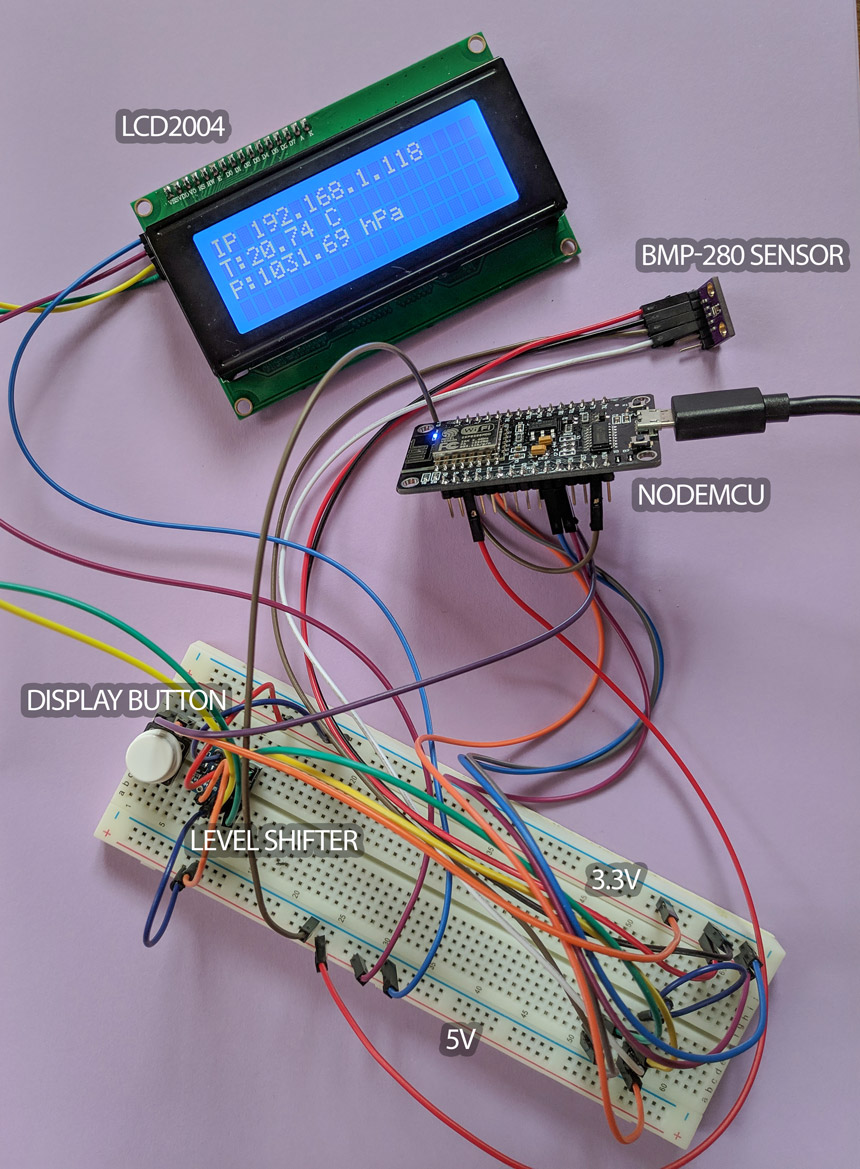 I’ve always wanted an easy to build weather station that is connected to my network. My first projects involved quite some coding but now with the ESPeasy firmware everyone can create an interesting project in only 30 minutes. The heart of the project is a NodeMcu, which is a small computer that has integrated wifi. We will connect a BMP-280 sensor to measure the temperature and humidity. The values can be seen on the lcd or on the webpage of the NodeMcu (his ip address).
The hardware:
1x NodeMCU (or a similar ESP8266 device)
1x Micro USB for NodeMCU
1x LCD 2004
1x BMP-280 Sensor (BME-280 would also have humidity)
1x Breadboard
1x Button
1x Logic Level Shifter (maybe not necessary for every lcd type)
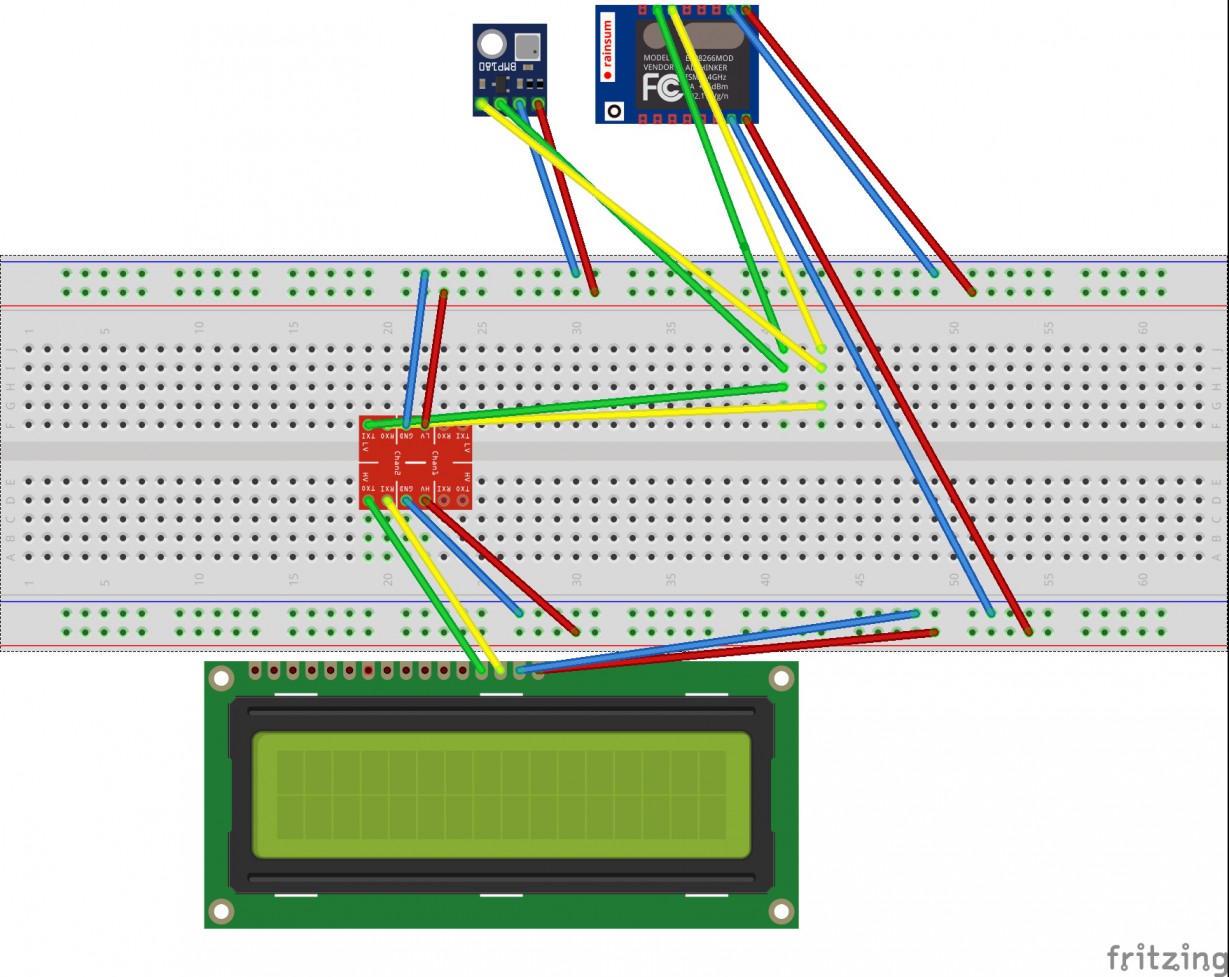
The wiring:
Connect the top red line of the breadboard to a 3.3v pin of the NodeMCU. This is the power for the sensor (unless you have the 5v version). On the bottom red line you connect the VU pin (or VIN if there is no VU). This is the 5v power for the LCD. Pin D1 is defined in the software as SCL and D2 as SDA. You can plug each one into a separate line on the breadboard. Then connect the SCL and SDA from the sensor to the corresaponding line. Connect the LV side of the level shifter: lv is 3.3v, gnd is gnd, lv1 is the sda line and lv2 is the scl line. Now on the other side hv is 5v, gnd is correlated gnd, hv1 is connected to the sda of the lcd, hv2 is connected to its scl. The schematics below should give you the idea. The pins are not where your pins are, as the program didn’t have the proper devices.
The software:
You can download the newest release of the ESPeasy firmware on: https://github.com/letscontrolit/ESPEasy/releases.
- Connect the NodeMcu to your computer and run the ESP.Easy.Flasher.exe.
- Scan for the port of your device and elect the correct version (…normal_ESP8266_4096.bin).
- You can then enter your Wifi name and password, so that it connects automatically.
- Click Flash ESP and wait. Maybe you need to click the RST button on the device if it takes to long.
- Now your done and you caan check on your router what the ip of the connected Nodemcu is.
- Enter that ip in your browser to access the webinterface.

The setup:
The setup is pretty intuitive. First go to Tools>I2C Scan. If everything is connected properly, this gives you the two addresses; one for the LCD and one for the sensor.
Now you can go to Devices>Edit and select the sensor BMP280. Select the correct address and give the values a name (temperature, pressure).
On the second line you can add the LCD2004. Again select the right address and choose the size of the lcd (4×20). On line 1 of the display you can write: IP %ip% to show the ip. On line 2 write T:[BMP280#Temperature] C to show the temperature, where BMP280 is your sensor name and Temperature the name of your value. On line 3 write P:[BMP280#Pressure] hPa to show the pressure.
Bonus:
1. You can make the display go off after a few senconds and use a button to turn it on again. Under Devices>Your LCD select a pin for the button. Then, connect the button to that pin and ground.
2. Advanced: You can make the Nodemcu send the sensor values with Mqtt. Set up your controller under Controllers and then you have the option under Devices>BMP280 to send the values.